Step 1: Download Stata
1. Go to http://download.stata.com/download. The following login box should appear in your browser. Enter your username and password (as provided in the email from Survey Design and Analysis), as well as the other information requested, and click ‘Log in’:
2. Select the ‘Mac’ option for your operating system:
3. Then click on ‘Stata17.dmg’:
4. The dmg file should now be downloading, and the following should appear in the top right corner of your browser (if you are using Safari):
NOTE: Please make sure that you have a good internet connection to be able to download the package.
Step 2: Install Stata
1. Once the file is downloaded you can run the Stata17.dmg file from your browser by clicking on the download arrow in the top right corner of the browser and then double-clicking the file. Alternatively, you can navigate to your Downloads folder and the Stata17.dmg file should be located here (as shown below):
2. Run the Stata17.dmg file, which should open the following folder:
3. Double-click on the “Install Stata” icon in the Stata17.dmg folder (above). This should open the installer and show the screen below. Click on ‘Continue’ to proceed.
4. Click on ‘Continue’ again to accept the licence agreement on the below screen:
5. Click on ‘Agree’ to accept the licence agreement:
6. Select your Stata edition, please make sure that you select the right edition as shown on your licence file, then click ‘Continue’:
7. Confirm where you would like Stata to install. The default is the Macintosh HD, however if you wish to change this to another location click on ‘Change Install Location …’, and once you are happy with the install location click ‘Install’:
8. Please wait while the software installs, the following screen should appear while installing:
9. Once installation is complete you should see the screen below. Click ‘Close’ to finish:
10. Your Mac will then ask if you want to move the Stata17.dmg file to the trash. If you would like to save the Stata17.dmg file to a USB or somewhere for easy re-installation later click ‘Keep’. Otherwise if you do not wish to keep it select ‘Move to Bin’:
1. To find Stata, go to your Applications folder and find a folder called Stata. Your new Stata program is located in this folder. Double-click it to run. Otherwise, the Stata program should have been added to your Launchpad screen, so if you use this to start programs you should be able to find it there too. Run the Stata program.
2. You will then be asked to initialise your licence, enter details in the following dialogue box (please copy-paste your Serial number, Code and Authorization to avoid typing errors):
To find the details required, open the PDF licence file, and you will see serial number, code and authorization. Once you have entered the information you should be able to click ‘Next’. If the next button is not lit up for you to click, it means you have not entered either your serial number, code or authorization correctly. For best results please copy-paste from the PDF licence file you were emailed.
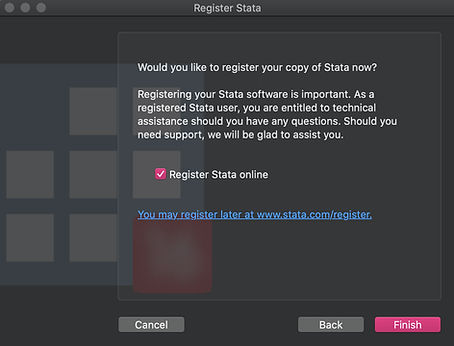
3. Ensure the following box is checked to register for access to Technical Support. Then click ‘Finish’. The licence is now activated.


3 Oct 2022
1 Oct 2022
28 Sep 2022
23 Sep 2022
23 Sep 2022
24 Sep 2022